I hit Chinook Pass for a few days out of the long Memorial Day weekend. When I came home and posted some pictures, my friend Katherine left a comment calling it a “someday goal.” I told her “someday” should be next weekend, and she responded that her first tour out after AIARE didn’t go super well and she thought she needed a bit more time and practice.
First of all, I want to share that tours still go poorly for me. It usually happens 1-3 tours a year. I find terrible snow, new gear causes hiccups, or I bite off more than I can chew by diving too quickly into long days or stacking too much touring on back-to-back days. Just this weekend I cried in my ski goggles skiing the Inter Glacier as I neared 11,000 ft of gain for the weekend and got terrible hot spots and tried to ski sticky, hot mush on achy legs. It happens when you’re pushing yourself. So on the flip side, if you’re looking to offset a challenging, disappointing first time out, find a route that’s cruiser and relaxed that’ll help rebuild that confidence.
That’s where Chinook Pass comes in.
Last year, I put together 10 tips for intermediate skiers getting into touring, and Chinook Pass checks a lot of those boxes. It’s 1,200 from the road to the top of Naches Peak, and a lot of the lines up there are even shorter since they come off the sub-peaks and shoulders. It’s perfect for doing laps. The road goes up to 5,500 ft., so most of the terrain is near or above tree line, so it’s easy to find open slopes. And the pass tends to open in mid- to late-May, so we’re talking spring corn season.
Before diving into routes and lines, here’s a quick intro to the zone. This is Naches Peak. There are a few others around Chinook Pass that all offer great skiing, but Naches is the closest and most popular. The pass is about 4 miles south of Crystal Mountain, so it might feel a bit more familiar if that’s your inbound home mountain. There are 4 fairly clean sides to it with bowls on each aspect.
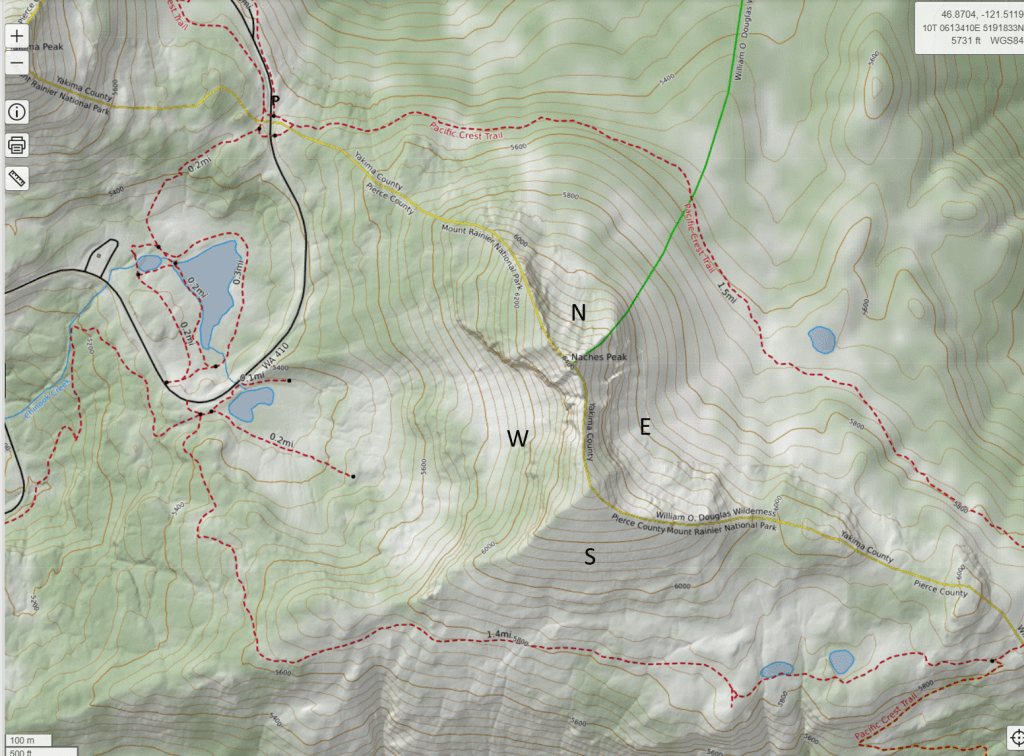
The aspect really matters in the spring because we’re looking for corn. Most days, the snow will freeze and get icy overnight and thaw out as the sun hits it. Sun rises in the east, sets in the west, and therefore you want to ski east stuff early in the morning and west stuff once the east side starts to turn to mush. Caltopo has a really cool feature that shows the amount of sun exposure at certain times of day. For hot days like last weekend (75-80 degrees in Seattle) without an overnight freeze, I’d plan to start skinning by 7 on the east side. But you can bump that later by an hour or two if it gets below freezing overnight or doesn’t get as warm during the day. An early start also helps with crowds. A lot of people show up at 11 when I’m usually cracking open my first après White Claw, and there’s nothing but challenging mashed potato snow left.
Below has a few mellow line options mapped out in 3 groups, in order of how quickly they soften up and the order I would ski them in. The colors mean:
- Red: Uphill travel
- Yellow: Mellow. On par with ungroomed greens and easy blues.
- Blue: On par with ungroomed harder blues
- Black: On par with ungroomed single black diamonds.
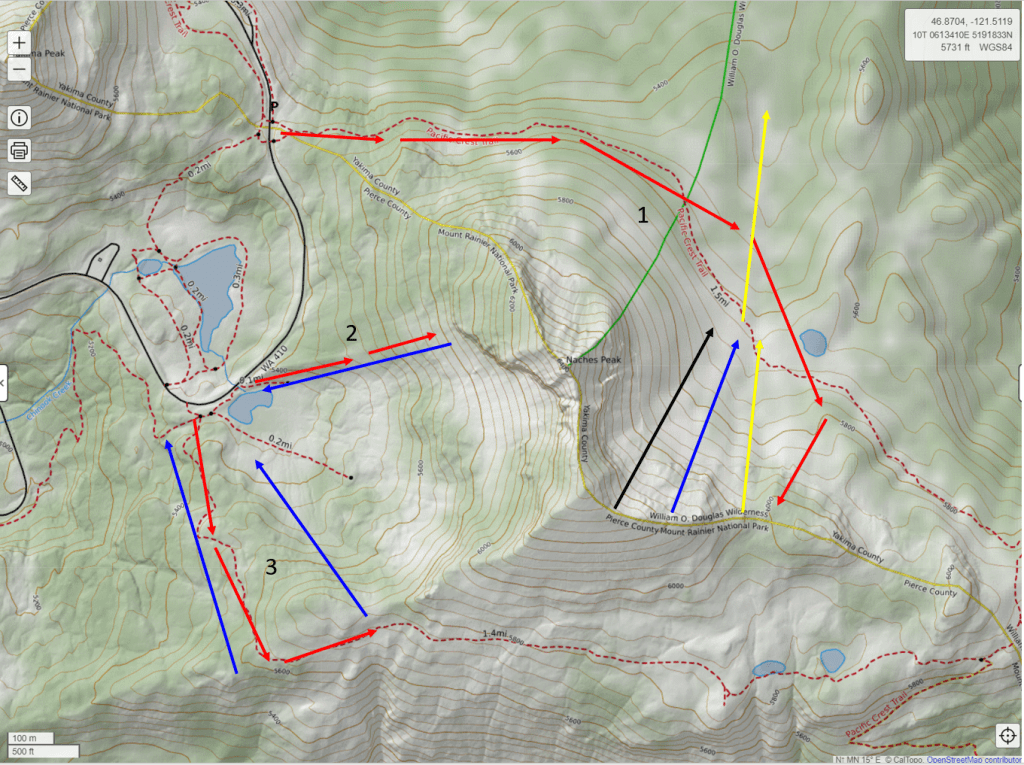
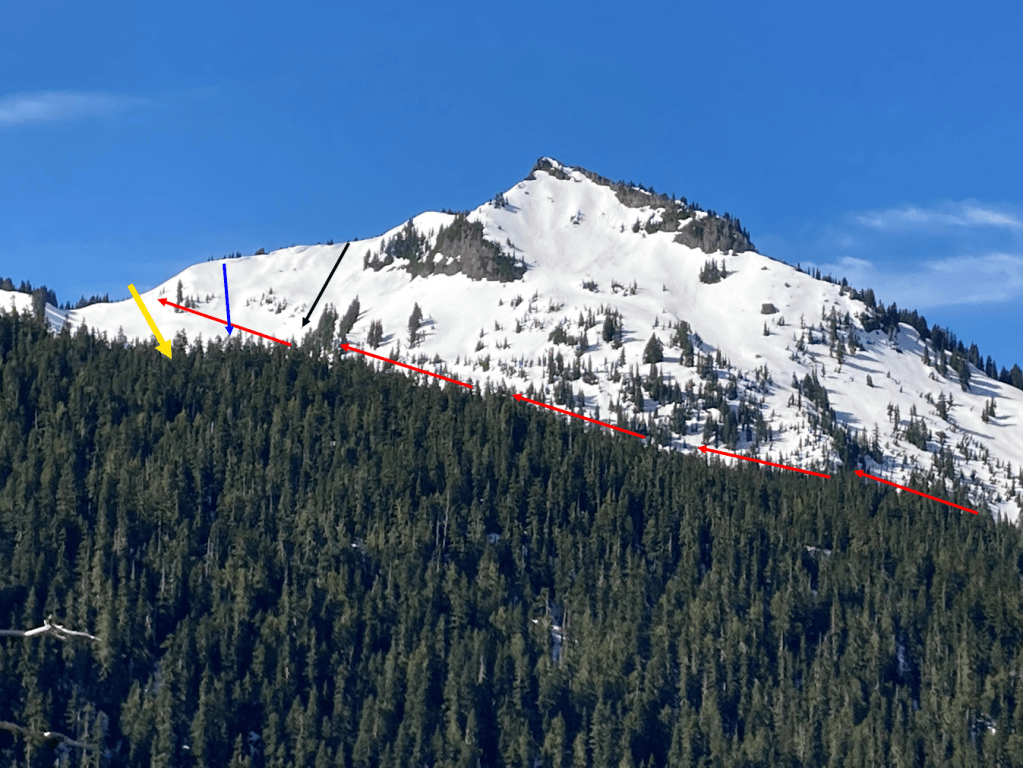
Starting with Zone 1 – the East Bowl.
My friend Mike got some great photos from the opposite ridge and his drive in, so I’ve overlayed the lines. For full disclosure, I usually reach this bowl by following the skintrack in “Zone 3,” but since this is the last side of the mountain to get sun and soften up, it usually requires ski crampons and involves more exposure than necessary to get to some of the mellower lines. I’d still take traction for any trip just in case, but it looks less crucial on this alternate route. Generally, your ascent route should take you through this area boxed in red:
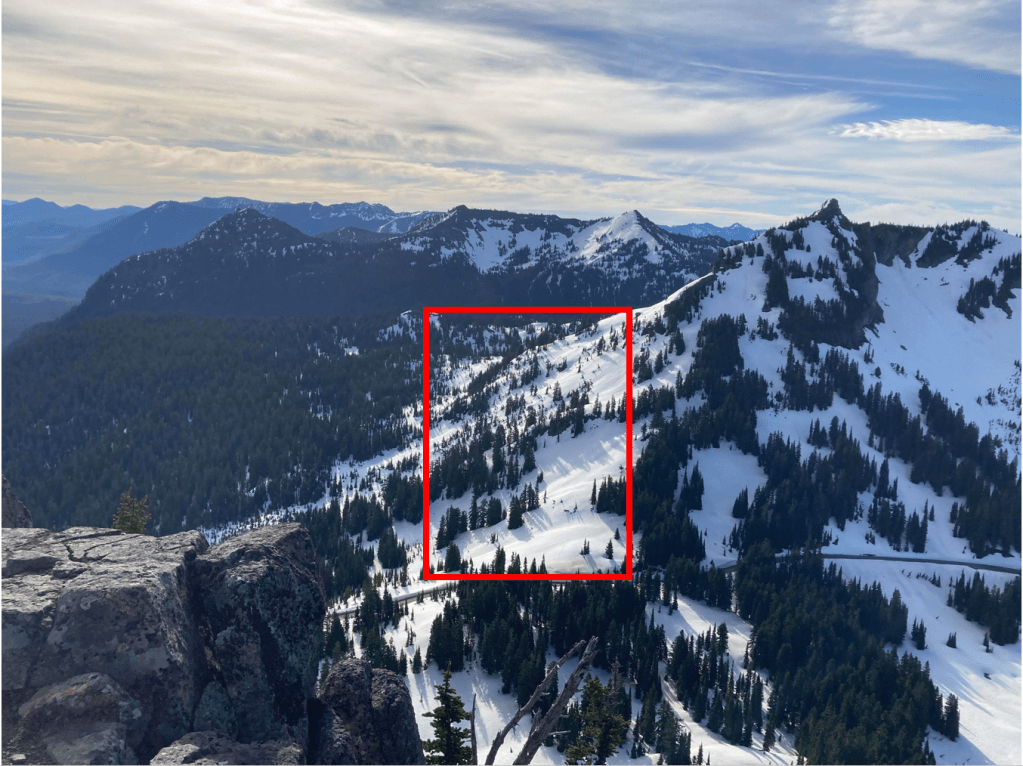
Here’s the view of the East Bowl:
And a view from on the mountain:
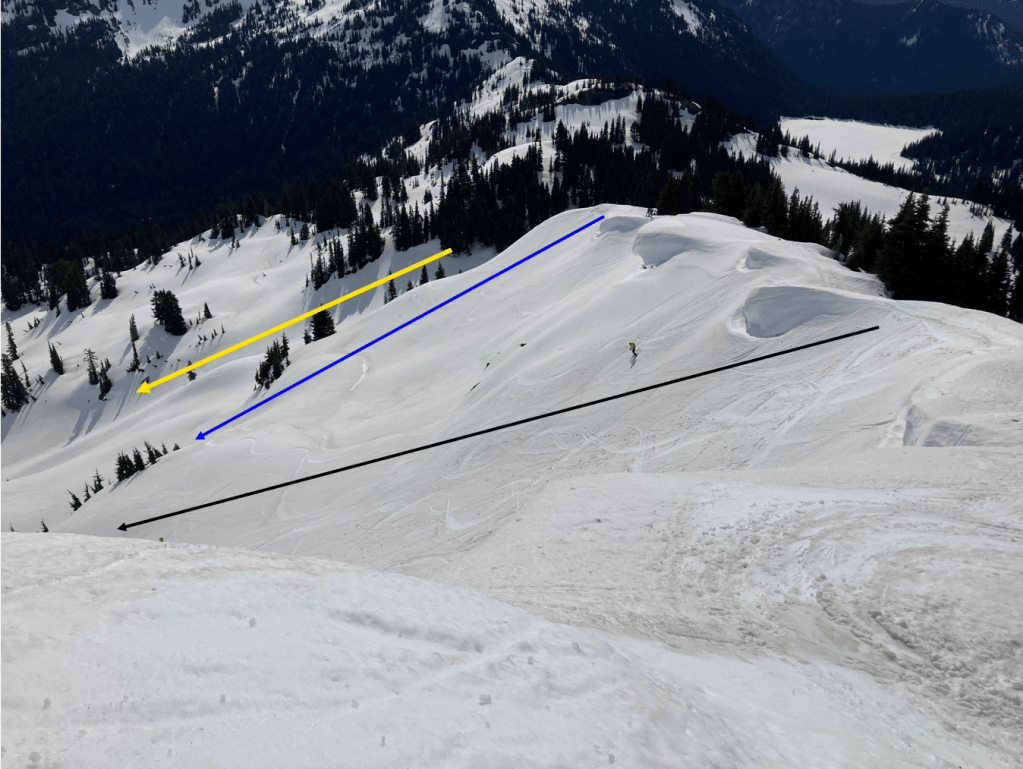
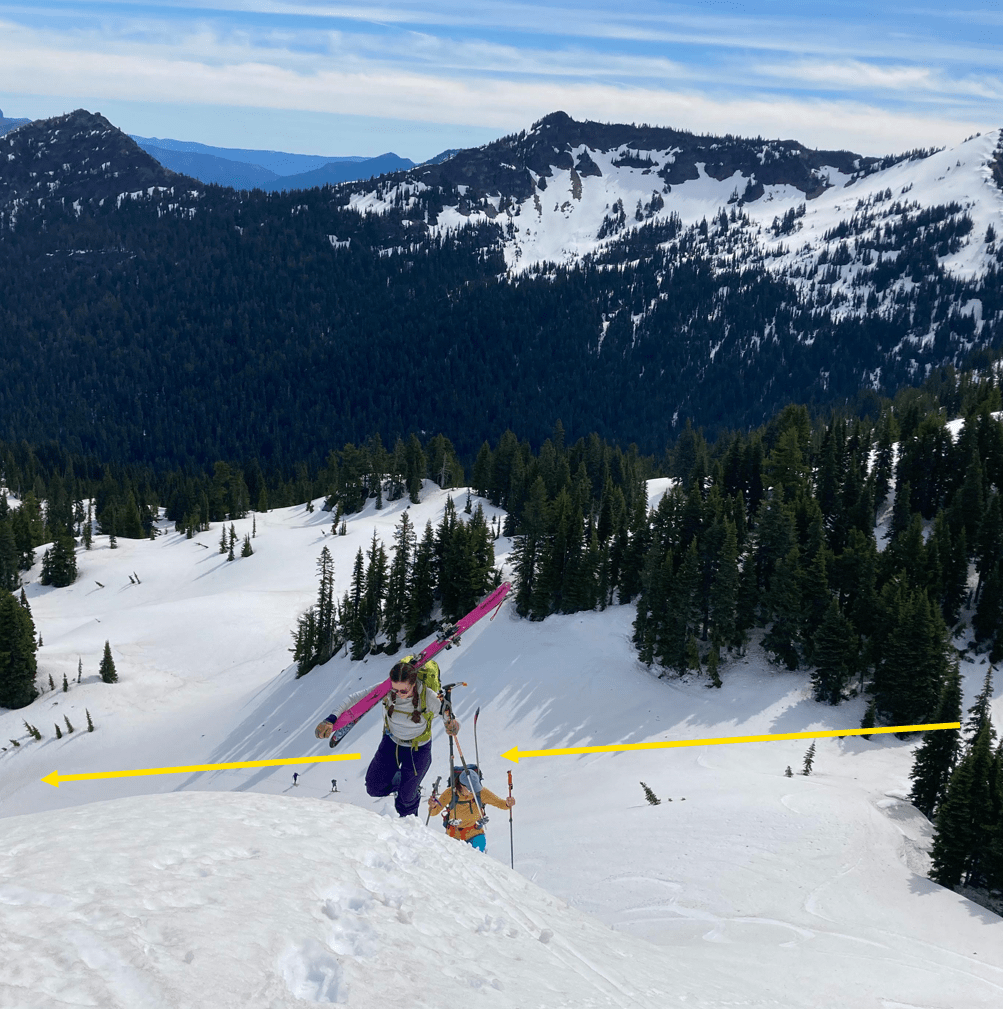
And another view of just the yellow line:
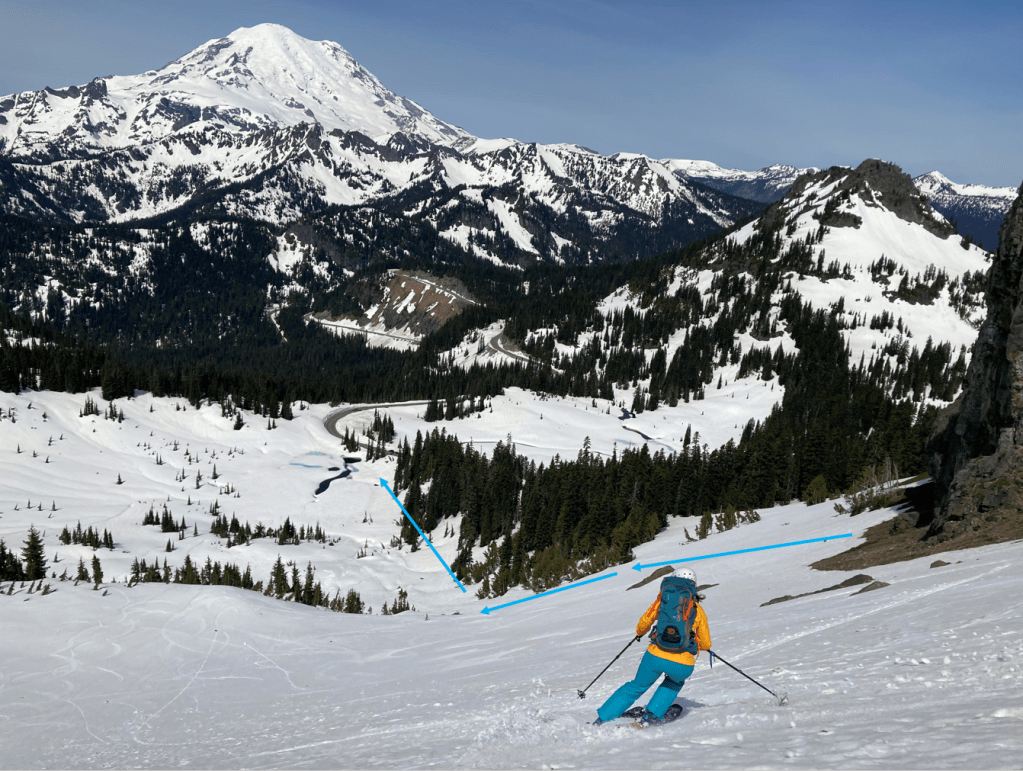
Moving on to Zone 2 and 3 that are in the West Bowl.
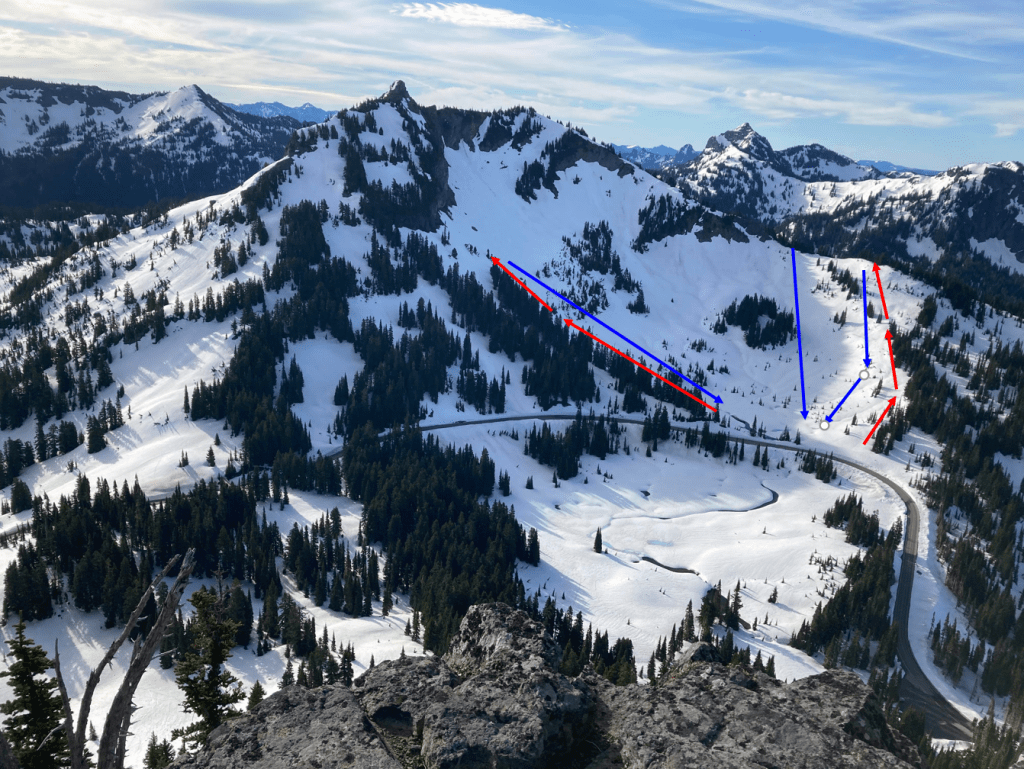
Here’s an aerial view of both. I’d ski the one on looker’s left first. I tend to traverse into this bowl from one of the snow ramps just below the summit, so keep an eye out for downhill traffic and overhead skiers kicking down sluff. On the uphill, I’d try to weave through the trees or stick close to them since it’ll keep you further right of the overhead traverse. Also note that there likely won’t be a set skintrack through this section since most skiers approach it from a different way. Go as high as you can comfortably skin or ski and finding a small patch of trees or a good protruding rock will help you find a small flat spot to transition. Here’s a view of the ski down:
Lastly, the lines on looker’s right. I don’t have great photos of the lines and skintrack, but this the most popular route on the mountain and tends to have a well established skin track.
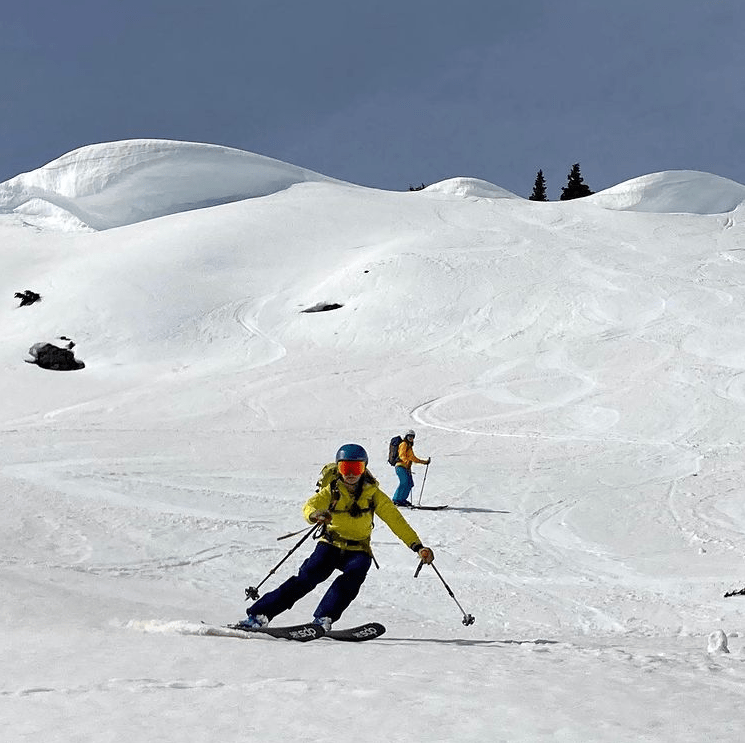
I strongly recommend starting early and keeping a beer or snack in your pack in case things are still firm. I also recommend having a few lawn chairs in the car with some après treats and posting up in a spot where you can watch other groups descend and give them a hoot and holler as they ski. You’ll see all types at the pass – skiers ranging from 8 to 80 and hardcore chargers to backcountry newbies booting up with alpine setups. And you’re sure to meet a lot of motorists who stop to sightsee who are getting their first glimpses of backcountry skiing, and even if you’re keeping it mellow and seeking out an approachable run, they’re going to think what you’re doing is super rad. And they’re right – you’re totally rad.
Big thank you to Mike Rolfs for literally every last photo in this route description – I appreciate it so much!
